|
|
|
Cents Catalog 2004 Making Web Pages
Previous Click here to return to the Main Menu
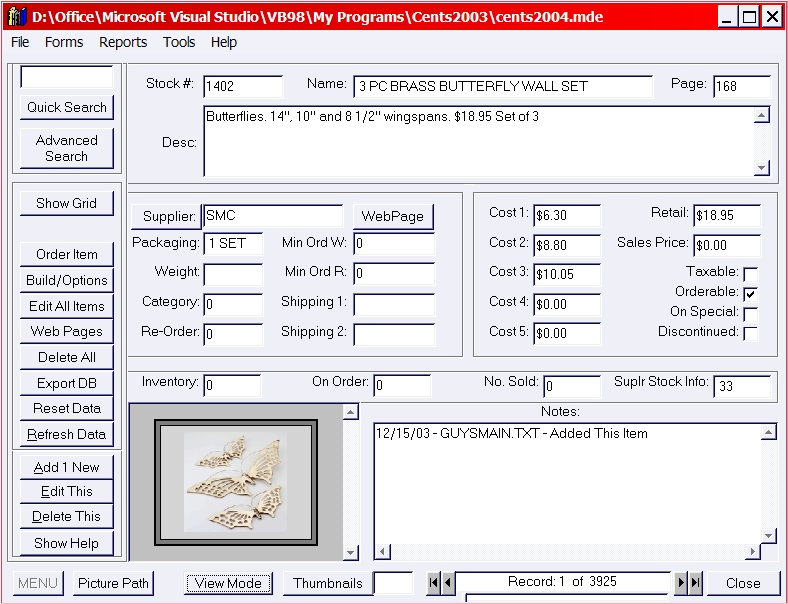
To make web pages fast and easy is a snap using the Cents Catalog 2004 web page creation option. To start it simply click on the button on the main products form, called "Web Pages" (If the menu box is not showing on the left, click the "Menu" button in the lower left corner of the main products form, this will bring up the menu bar. It will look similar to the picture below.
After you press the "Web Pages" button, the screen will give you more options, as in the picture below.
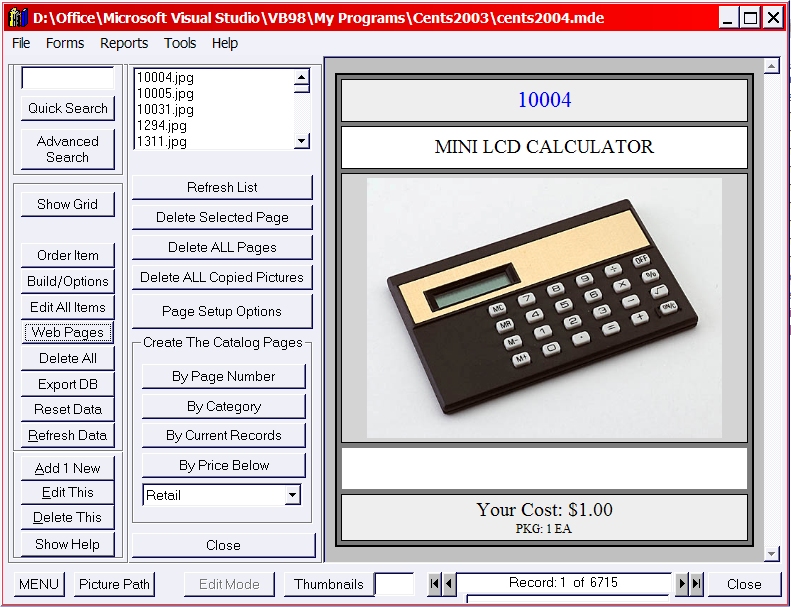
Now these options are described below in order from top to bottom.
In the box showing the jpg picture file names, will be also where any and all web pages you create can be found, you can double click them to view any of the pages.
The button "Refresh" will simply refresh the box above it so that any new pages are displayed as well.
The button "Delete Selected Page" will do exactly that. Click on any of the pages in the box above, then clicking this button will delete that page from you hard drive. (NOTE: This is a permanent deletion)
If you click the next button "Delete All Pages", it will delete permanently from your hard drive all the pages you have created that are listed in the above list box.
The next button "Delete All Copied Pictures" will delete any and all pictures you may have had copied to the images folder during a page creation. (More on that later)
Click on any of the buttons, to create pages by "By Page Number", "By Category", "By Current Records" or by the price of the items, retail, costs by selecting the price in the drop down list, then clicking on the "By Price Below" button.
Note: That the button "By Current Records" will use ONLY the records you have showing. For example, if your data is say 4,000 products, and you click the above button, it would use all 4,000 products to create your pages (selectable as described later), but if before you clicked this button, you went to the advanced search button, and did a search for items that were angels, and that search produced 200 items out of your 4,000 that were angels, now when you clicked the above button, the web pages would be created using only those 200 items as they would be your current records after the search. This is a quick and easy way to create specific web pages for groups of items, without having to sort through all your items in the database.
Once you have clicked the button of your choice, the program will sort and organize the data accordingly, and a screen similar to the one below will become visible.
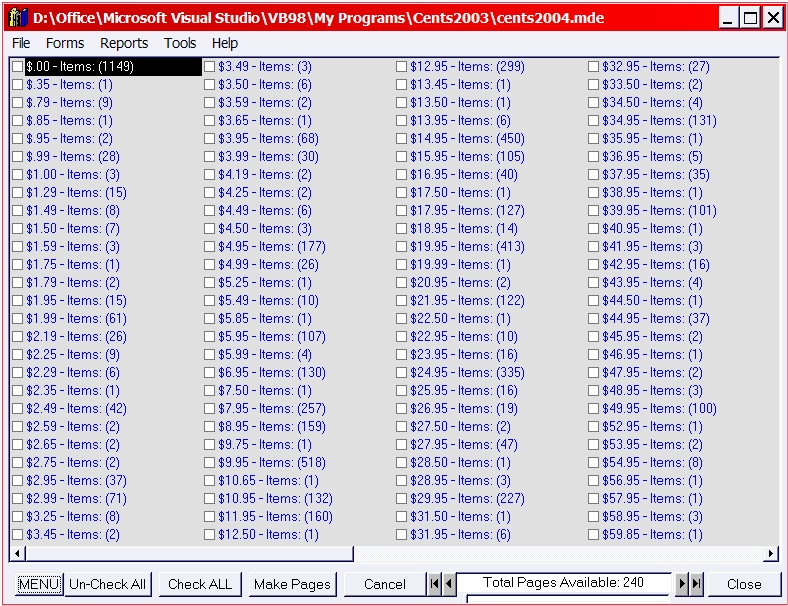
In the above example, the program used all 6,417 products, and the "By Price Below" with the "Retail" option was clicked. It took only a few seconds for this screen to appear. Notice that you can select which ones you want to use by checking the boxes to the left of each item in the list. You can select one or any combination, or all the items showing in the list. For this demonstration, we will check only 2... the $.99 and the $1.99. This will give us a total of 28 items in the $.99 and 61 items in the $1.99 for a total of 89 items for the web pages. When you have selected the items you want, click on the "Make Pages" button. A screen like the one below will be displayed.
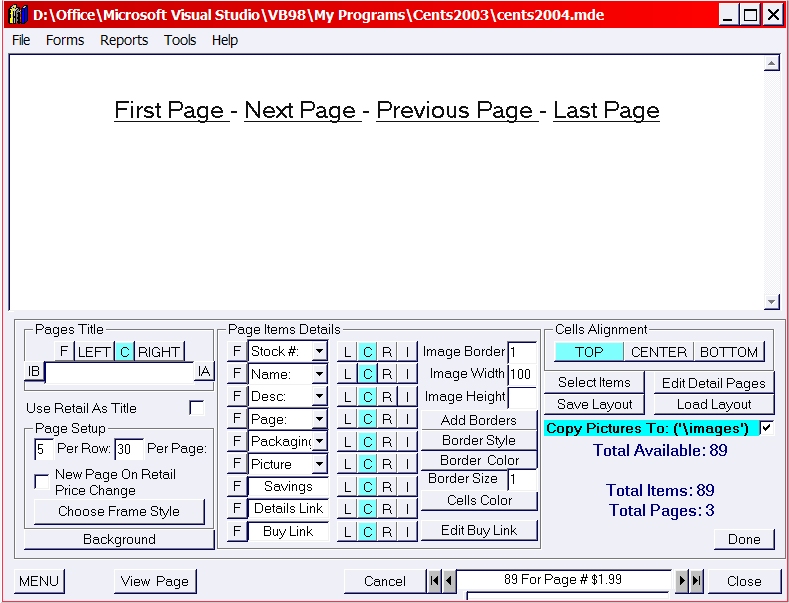
In the above section, is a preview of what the page will look like. It is updated nearly instantly as you add and change any of the options to the page. Starting on the top left section titled "Pages Title" each button will be explained.
In the Pages Title section, the buttons "F", "Left", "C" and "Right" have the same functions as below. The buttons "IB" = (Insert Before the Title), and "IA" = (Insert After the Title)
You can type in the name to go at the top of the page in the text box below these buttons, or you can click the check box "Use Retail As Title" and each page will have the Retail Price as its title... in our example; $.99, and $1.99.. you can add any text before or after these using the box above.
On all the options, you will see that most have buttons: "F" = ( Click to select the FONT), "L" = (Click to align the entry to the LEFT of the page), "C" = (Click to align the entry in the CENTER of the page), "R" = (Click to align the entry to the RIGHT of the page), "I" =(Click to INSERT a line of text, picture, etc directly after the item on the page).
You decide how many items across each page, in our case above there are 5 items. With 30 items max per page. This option allows you to create multiple pages that have fewer items, so load faster. Keep in mind that the more pictures you have on a web page, the longer it takes to load for those who are surfing your pages. 30 is a good number, to use, but you can select any amount you choose here also.
Clicking the "New Page On Retail Price Change" check box will have the program to automatically create a separate page for each price in our example, starting a new page for each different price.
You can choose to have frames, or standard pages using the "Choose Frame Style" button. Clicking the "Background" button will allow you to change the background color, or use a picture as the pages background.
In the middle section: "Page Item Details", you select what data you want, and in what order you want it to appear on your page. Do this by clicking the buttons in the order you want each item to appear from top to bottom. If you wanted to change the order once you have clicked several items, simply drag and drop the items where on the list you want them placed. For example, you chose the first item to be the "stock #", then you chose to show the "picture" then you selected the "Name" as the next item... you decide you want the name to go before the picture, so click and hold the mouse button down, on the "Name" and move it while holding the button down to the "Picture" above it, and release the mouse button, and it will change the order as you will see in the preview above.
You can use separate fonts, sizes, font colors and styles for each of the items you place on the page using the above described buttons for each item you place, and want to change its font, or orientation.
You can place a boarder around the pictures, and decide how thick and what color of border. You can change the size the pictures are displayed at using the image width, height. (NOTE: To keep a pictures original aspect ratio so that the picture looks good at the different sizes, use only one or the other... width, or height, and leave the one you do not use blank, as in the default example, the width is 100 and the height is blank.)
You can add borders and change its size shape and color around each row and page using the buttons below the picture size options.
The button "Edit Buy Link" will allow you to add the shopping cart, or link information so that when a user clicks the buy link on the page it will take them to the proper place. (This information is usually available from the source of where your payments are taken. You can simply get the code from them, and copy past it into this link.
The last group is called "Cells Alignment" and the first buttons allow you to align the positions of the cells on the page so that the items in each cell or group aligns to the top, middle or bottom of each cell.
The button "Select Items" allows you to choose which items you want or don't want to include in your pages. So if there were items that did not have a picture, or an item that was out of stock, discontinued etc... you could keep it from being on the web page by simply checking and un-checking each item you want or not.
The button "Edit Detail Pages" will allow you to customize the detail pages for each item if you added the "Details" link to each item. This will enable you to create and customize each item with its own details page, and is designed the same way as above.
"Load Layout" and "Save Layout" buttons, will allow you to save and load any pages you created. So after you create the page the way you want it to look, you can save it's layout, and use the same look, fonts, etc for any items, by loading that layout, without having to re-do the each page.
The check box "Copy Pictures To ('\images')" enabled by default, will automatically copy all the pictures in your pages if you choose to use or show the pictures on your pages, into a folder called 'images' in your folder in the Pages folder in the Cents Catalog 2004 installation folder. This way you can easily upload the web pages you create, along with the images folder to the server where your pages are on the internet. This way all your images are easy to maintain, and upload.
When your done designing your pages, click the "Done" button, the click on the "Make Pages" button, and in seconds, the program will create all the pages for you, ready to upload, or use on you own computer.
That's all there is to it. You can't hurt the program by experimenting, so the best way is to simply play with it, and see what you can create.
Have fun, and enjoy!
Previous Click here to return to the Main Menu
![]()