|
|
|
Cents Catalog 2004 Getting Started Page 2
Previous Click here to return to the main menu. Next
A box will come up, that will look similar to the one below, there are several choices:
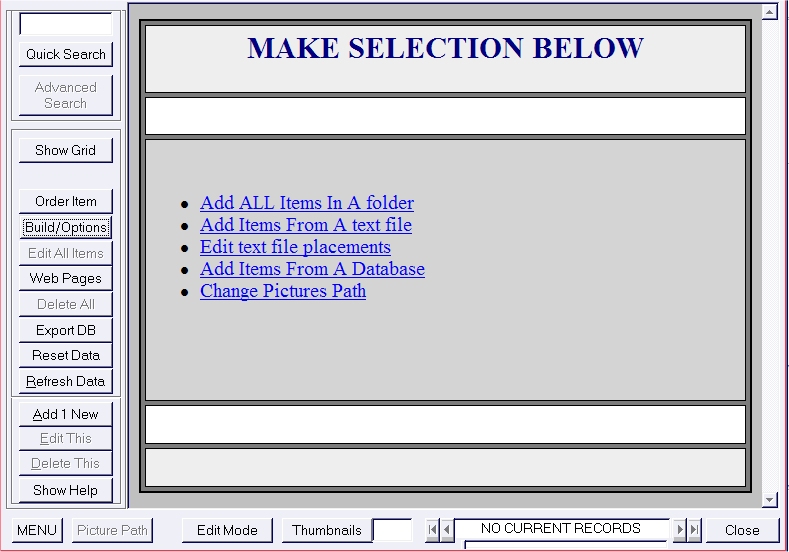
Depending on where and if you have your products, inventory, items listed in a text file, a database, or none at all, will determine which one of these options you will need to select.
NOTE: If you do NOT have your items already in a text file, or database, then you will need to enter them into Cents Catalog 2004 one at a time so do NOT use this button. See adding items manually in this tutorial, or create a text file with your items in it first, then choose the text option as explained below.
Click on the option name Below to see information on that particular option
The "Text Files" option, this would open up a dialog box which allows you to select the file you wanted to extract the data from.
The "Edit Database Placements" Button allows you to change where you want the selected items in any given text file to be placed within the Cents Catalog 2004.
The "Import From Database" option would allow you to select a database and import it's contents into the Cents Catalog 2004.
The "All Items In A Folder" option allows you to select any folder or directory on your hard drive, and catalog the items in that folder or folders into the Cents Catalog 2004.
The "Change Pictures Path" will allow you to choose the folder where ALL the pictures for the items you currently have in the Cents Catalog 2004. You can even choose a web page address if they are located on the internet. This works only if your items pictures have the same name as your items "Stock Number" followed by either the .jpg, .gif, .bmp extension. It is recommended that you place all pictures for your items into the "Pictures" folder in the installation directory of Cents Catalog 2004. Make sure to name each picture after the items stock number IE: item stock number is 1234 then it's picture would be named 1234.jpg, or 1234.gif, or 1234.bmp. This option will change ALL the items in the catalog to the folder or internet address you specify. If your pictures are in various locations, you can edit them manually for each item. (This will be discussed later)
Once you select which option you want, you would press the "Start" button in the lower right corner. This will bring up a box that looks like the one below:
*Note: If you already have information entered into Cents Catalog 2004, there will be a box that comes up first that asks you to press either the "Yes" button or "No" button, depending on whether you want to add any new items in the file it finds, or just edit the ones you already have in Cents Catalog. Choose one of those options, then the box below would come up. Here you locate the folder and file you want to extract the information from into the Cents Catalog 2004.
*Note: If you have selected the option to change the pictures path, then a box will come up first asking if you want the pictures to come from an internet site or not... If your not going to link the pictures from a web site, click no. If you do, then make sure you know the internet sites full address, and click yes, it will then ask you to enter the sites address. The it will ask you to choose the picture files extension like JPG, BMP, GIF etc...
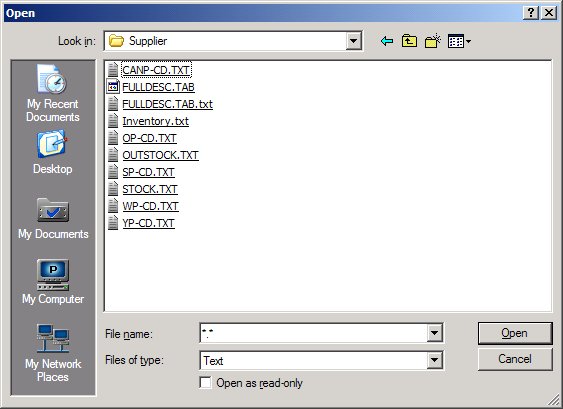
Either click on the file name you want, or type it in if you know its name. (Make sure your in the correct drive and folder where the file is stored on your hard drive.
Then click the "OPEN" button once your file is selected, or double click the file name for the same results.
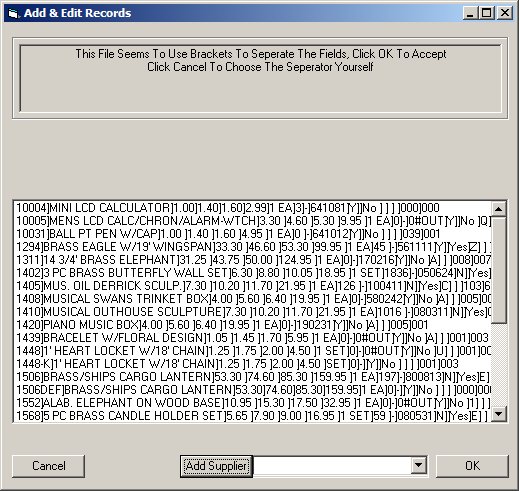
NOTE: The boxes and information below is only done once for each file name. You DO NOT need to do the things explained below again, unless you choose to "Edit Database Placements" option as explained above. If you have previously done the steps below with a file name, then the boxes described and the steps below will NOT come up.
Once you click "OPEN" another box will come up that looks similar to the one below, depending on which version your using. In the below example, there are no headers or blank lines at the top of the file. So in this case, you would click on the top line. If there were lines above the main text that were NOT actual data or item information like headers or labels, you would click on the first line that below those that was data as in the sample below. Once clicked, a button will appear that says "OK" on the right side of the box below. It will also tell you what kind of delimit, separators the file is using. If it is not as the program sees it, then you can choose what is separating each items data on each line by clicking the cancel button as it says. In nearly every case the program will know and have it correct, so simply click the "OK" button.
A box will come up asking if you want to put a note in the notes section for these items. You can choose to do so or not.
Then a box will come up telling you there are so many items in the lines, if it is correct, click "OK"... or you can add additional spaces for lines that may contain more data than the line you clicked as the first line. In nearly all cases, simply click "OK" since you rarely will need to change it.
Now the box will look similar to this one, again depending on what version you have:
In the section on the right will be each field of data. Drag the data one at a time from the right and drop it onto the box on the left where you want to place that data in the database. Once you have placed the data you want to use onto the fields on the left you want the data to appear in, click the button on the bottom right that says "Done". The program will automatically build the data into Cents Catalog 2004.
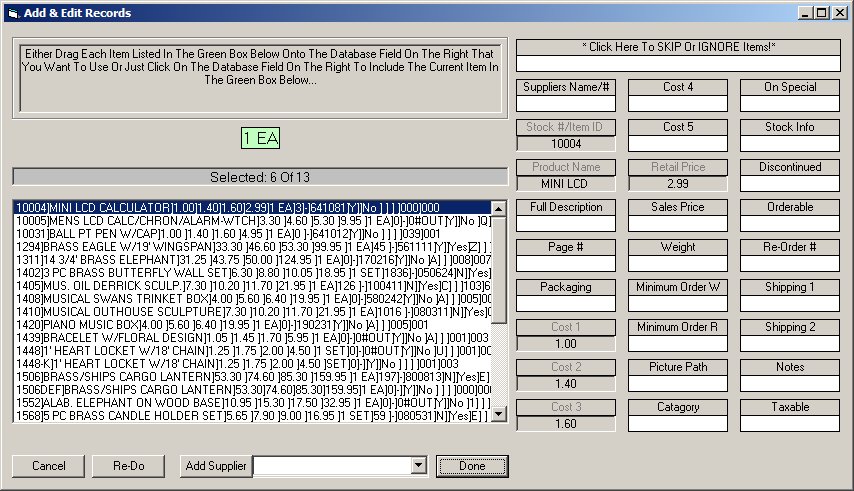
That's it, you have now created your catalog with all your items/products in just minutes.
That's ALL there is to it!
Previous Click here to return to the main menu. Next
![]()